Installation guide to Mytril
Installation
Get started integrating Mytril, a lightweight and powerful Svelte component library, into your SvelteKit application. Below is a step-by-step guide to help you install and configure Mytril with ease.
Follow the steps to install Mytril
🔹Step 1: create your SvelteKit project
If you haven’t already created a SvelteKit project, initialize one using the following command:
Replace my-mytril-app with your desired project name.
🔹 Step 2: install Mytril
Mytril provides two installation methods: a streamlined CLI or manual setup. Choose the one that suits your development workflow.
install Mytril with CLI (Recommended)
The Mytril CLI simplifies the integration process. It will automatically configure necessary files like vite.config.js and your main style file.
Command:
Options install with CLI:
- Replace
[path-css]with the path to your main CSS file (e.g.,src/app.css). - If no path is provided, it defaults to
src/app.css.
Example CLI configuration:
By default path-css is auto set at src/app.css
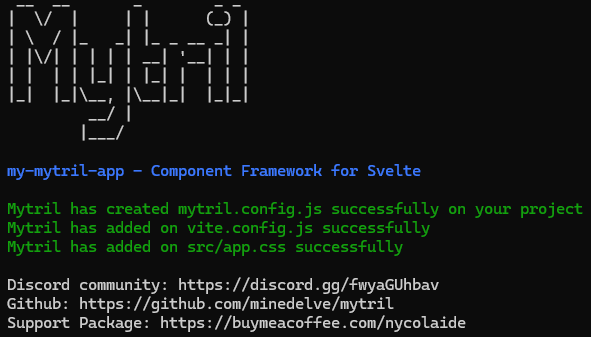
Example CLI output
Here is a preview of what the terminal looks like during the CLI installation:

Or use manual installation
Follow these steps for manual integration:
🔹 Step 1: create a configuration file
Create a new mytril.config.js file in the root of your project and paste the following code:
🔹Step 2: update vite.config.js
Add Mytril as a plugin within your vite.config.js file:
🔹Step 3: import styles
Finally, import Mytril’s CSS directly into your main stylesheet:
And that’s all! You’ve successfully completed Mytril’s manual installation.
Requirements
Before installing Mytril, verify that your project meets the following minimum requirements:
| Package | Minimum version | Official documentation |
|---|---|---|
| Svelte | v5.16 + | Svelte Docs support by Mytril |
| Vite | v5 + | Vite Docs support by Mytril |
| Node | v20 + | Node.js Docs support by Mytril |
For enhanced features, consider integrating optional tools:
| Package | Minimum version | Official documentation |
|---|---|---|
| Iconify | v4 + | Iconify Docs support by Mytril |
Get started with Mytril
Congratulations! You’ve installed Mytril on your SvelteKit project. You’re now ready to start building modern, customizable user interfaces using Mytril’s powerful design system. Be sure to check the official Mytril component library documentation for more advanced features and component usage.
Next Step: dive into the Components Documentation to learn how to use Mytril in your project.